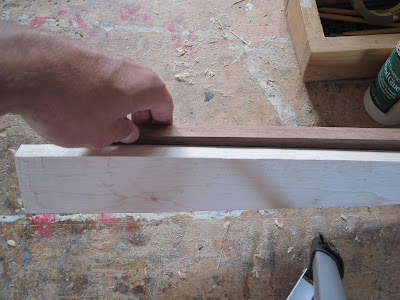
I've been working more on the neck.
 You can see here that I have cut out the neck shape and the fingerboard shape on the band saw.
It didn't look too shabby. Until I realized I made an amateur mistake...I cut out the neck shape before I cut my truss rod channel!
What a chucklehead move.
So how did I fix this? This is how:
Double stick tape! I'll show you how.
Cut a couple of pieces of tape and stick it to a board. You should use longer pieces than I have shown here...
Stick them to the board like so.
Here's what it should look like. Even with the two small pieces of tape I practiced with, you can see me holding it on with my hand on one board.
Line up your fence and run it through the saw a few times to get the right width.
And voila!
I neglected to mention that I cut the truss rod slot too wide initially. I panicked about this having a mild heart attack for a short time, and then got over it and figured out how I'd fix it. I cut a piece of the section leftover from trimming the neck and made a shim-like piece. Unless one looks for it, it is difficult to tell that it is there. This is the thin piece of maple I used to shim in the truss rod channel.
I obviously cut a small piece from it and didn't use the whole piece. I have plenty left to shim things later if needed.
I don't know if my truss rod needs to run the entire length of the neck yet...it will not be double action, so I may just need it to run most of the way. If it has to go all the way, I can deal with that later. I also cut the head depth.
Here is the fingerboard on top of the neck. It is going to be awesome.
I used a spindle sander to smooth out the sides and such. Should I have cut the fret slots first? Probably, but I didn't have the tools and I CAN do it later.
And I got some tools. The school has routers, but none are plunge routers, and I figured I'd be wanting one in the future anyway. The first picture is my carbide tipped blade set.
And here is my router.
Here are the pieces that I will use for building my own single action truss rod. I think a single action truss rod may better for the structural integrity of the neck as opposed to a double action, as the TR channel is not as deep.
I picked up a piece of 4' long unthreaded steel rod for a pittance at the local hardware place. It has a diameter of 3/16".
Here are some 10-32 hex nuts (you can't buy just one, I looked - but they are cheap) [top] and a 10-32 T nut. The T nut will be threaded on and attached with some loctite or cold weld or something as I don't know how to weld yet. The hex nut will provide my adjustment.
And here you can see the fruits of my current labor!! The unfinished truss rod fits into the slot perfectly.
I have an order from STEW MAC on the way which includes the following:
0130 500K Control Pot
0158 Fretwire Wide "Pyramid"
2' Piece
0170 Chrome Strap Buttons -
Set of 2
0415 8in Sanding Block with
7-1/4in radius
1463 Pickup Coil Wire 43 Gauge
1819 Flush-mount Stereo Output Jack
4937 Custom Dome Knob Ivoroid
6mm Shaft
5276 Locking Roller Bridge
Chrome
5280 Auto Trim Planet Waves
Tuner Chrome 3L 3R
5745 Adjustable Pull Fret Saw
5943 Humbucker Polepiece Slug
5944 Humbucker Polepiece Screw
5945 Humbucker Magnet Alnico 5
5946 Metal Humbucker Spacer
6001-V Shaped Vintage Bone Nut
I have a lot left to go! It's a-gonna be a bumpy ride!
Why so much fret wire you ask? Well, (a) I'm making a zero fret - I'm going to have a fret right next to the nut that does nothing except offer a perfectly even surface for all six strings to cross. I'm doing this because I do not have confidence in my nut making ability. (b) I still have another guitar to make!
You can see that an important piece of the equation is still missing. I do not have a tailpiece...
I'm going for the Bigsby B-5 tremolo. I have been in love with the idea for ages, now. And since that is about the last thing I need to put on the guitar, I'm not too worried about it currently.
B5 vs. B50
A NOTE ON BIGSBY TREMOLOS: If you decide to purchase one of these, be careful! A lot of eBay sellers will say that they are selling a B-5 when in reality it is a B-50. There is a distinction and an easy way to tell apart the fakers. A "Bigsby licensed" tremolo will almost ALWAYS be a B-50. You can tell based on what it says on the bottom of the tremolo. It will either say "Bigsby" alone with nothing else or "Bigsby Licensed." The "licensed" part will appear under the "Bigsby" and will be significantly smaller. People claim the b% is a more solid tremolo. The bar at the horseshoe opening is apparently permanently fixed as opposed to the B50, which I assume is not. Take these examples:


No comments:
Post a Comment
Please do not leave anonymous comments. Type in your name, or even better, become a follower!